DIY Ice Mold Wine Bottle Chiller
This DIY ice mold keeps wine bottles chilled and adds a decorative detail to parties, showers, and holiday celebrations. It’s easy to make without spending money on a mold system, and it keeps wine, champagne, liquor or juice chilled while you’re entertaining. I’ll share two methods plus lots of helpful tips!

I’ve been making these ice bottle molds for more than 15 years, and I first shared these instructions back in 2010! It’s such a festive detail to add to your holiday bar but it’s also gorgeous for showers and other celebrations. It’s all in the choice of add-ins that take it from theme to theme.
While this is a simple project, you do need to give yourself a couple of days to freeze the layers. I suggest you make this at least a week before your party so you have plenty of time to freeze the layers, time to unmold it, and less work to do just before your event.
And if you love the idea of an ice mold, you can also make an ice bowl for serving shrimp cocktail, ice cream, fruit or salad.
What It’s Best For
You’ve likely seen this method for holding bottles of chilled white wine or champagne, but it’s also a great way to keep liquor cold.
This works specifically well for vodka and tequila because those are typically served well chilled. Plus, they can go in the freezer without turning solid, which makes creating the ice mold much easier.
This works for non-alcohol drinks too, like juice or punch. For those I recommend placing an empty flip top bottle before freezing, and then filling it with the drink using a funnel.
What You Need
I know there’s a mold you can buy, but I was making these for years before those were ever on the market! Once you have these inexpensive supplies you can use them over and over again to create beautiful ice chillers.
Here are the basic items and I’ll share how you can use them in different ways depending on the outcome you want.
- A large cylinder container. You can use a 3-liter empty soda bottle that you cut the top off of (so you have a straight edge without the pour spout), or a plastic bucket.
- A smaller inner container. If using a 3-liter bottle for the outside, you can place an empty wine bottle on the inside. You want at least ½-inch of space between the inner and outer vessels, but closer to an inch is better.
- If you’re using a plastic bucket you likely have room to place an empty 2-liter bottle on the inside, which is great for holding champagne bottles.
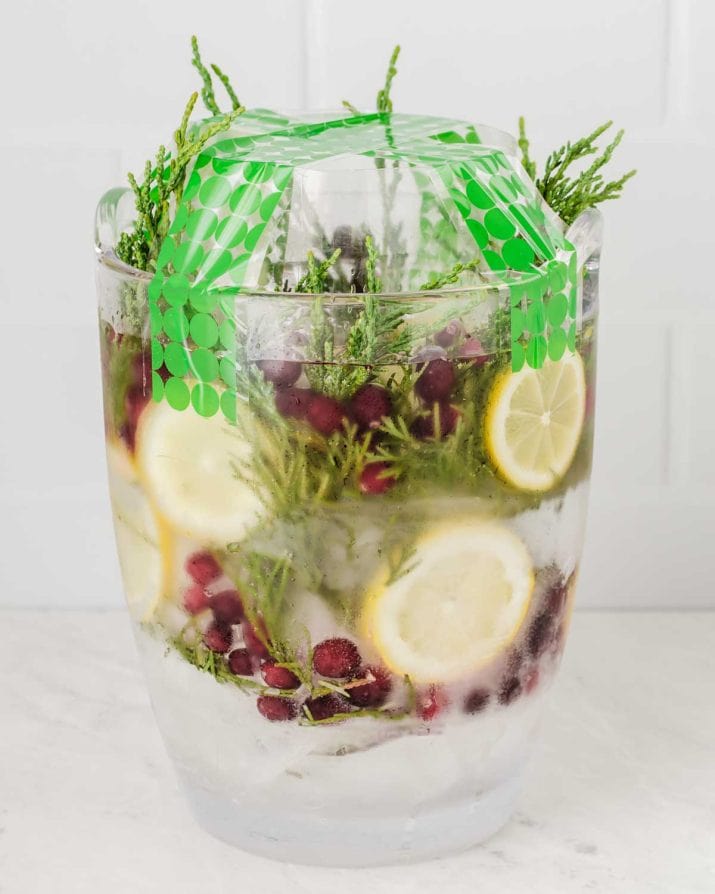
- Decoration filler. This is what you’ll add to the space between the inner and outer vessels, along with water. You can use fresh fruit slices such as lemons, limes, oranges, star fruit, or whole cranberries, as well as cut greenery for Christmas themes.
- Stabilizer. As water is added to the mold, you’ll need a stabilizer to keep the inner container from rising with the water. Duck tape is my go-to options, but if you have some rocks or heavy beads, they can also work well.
How to Make It
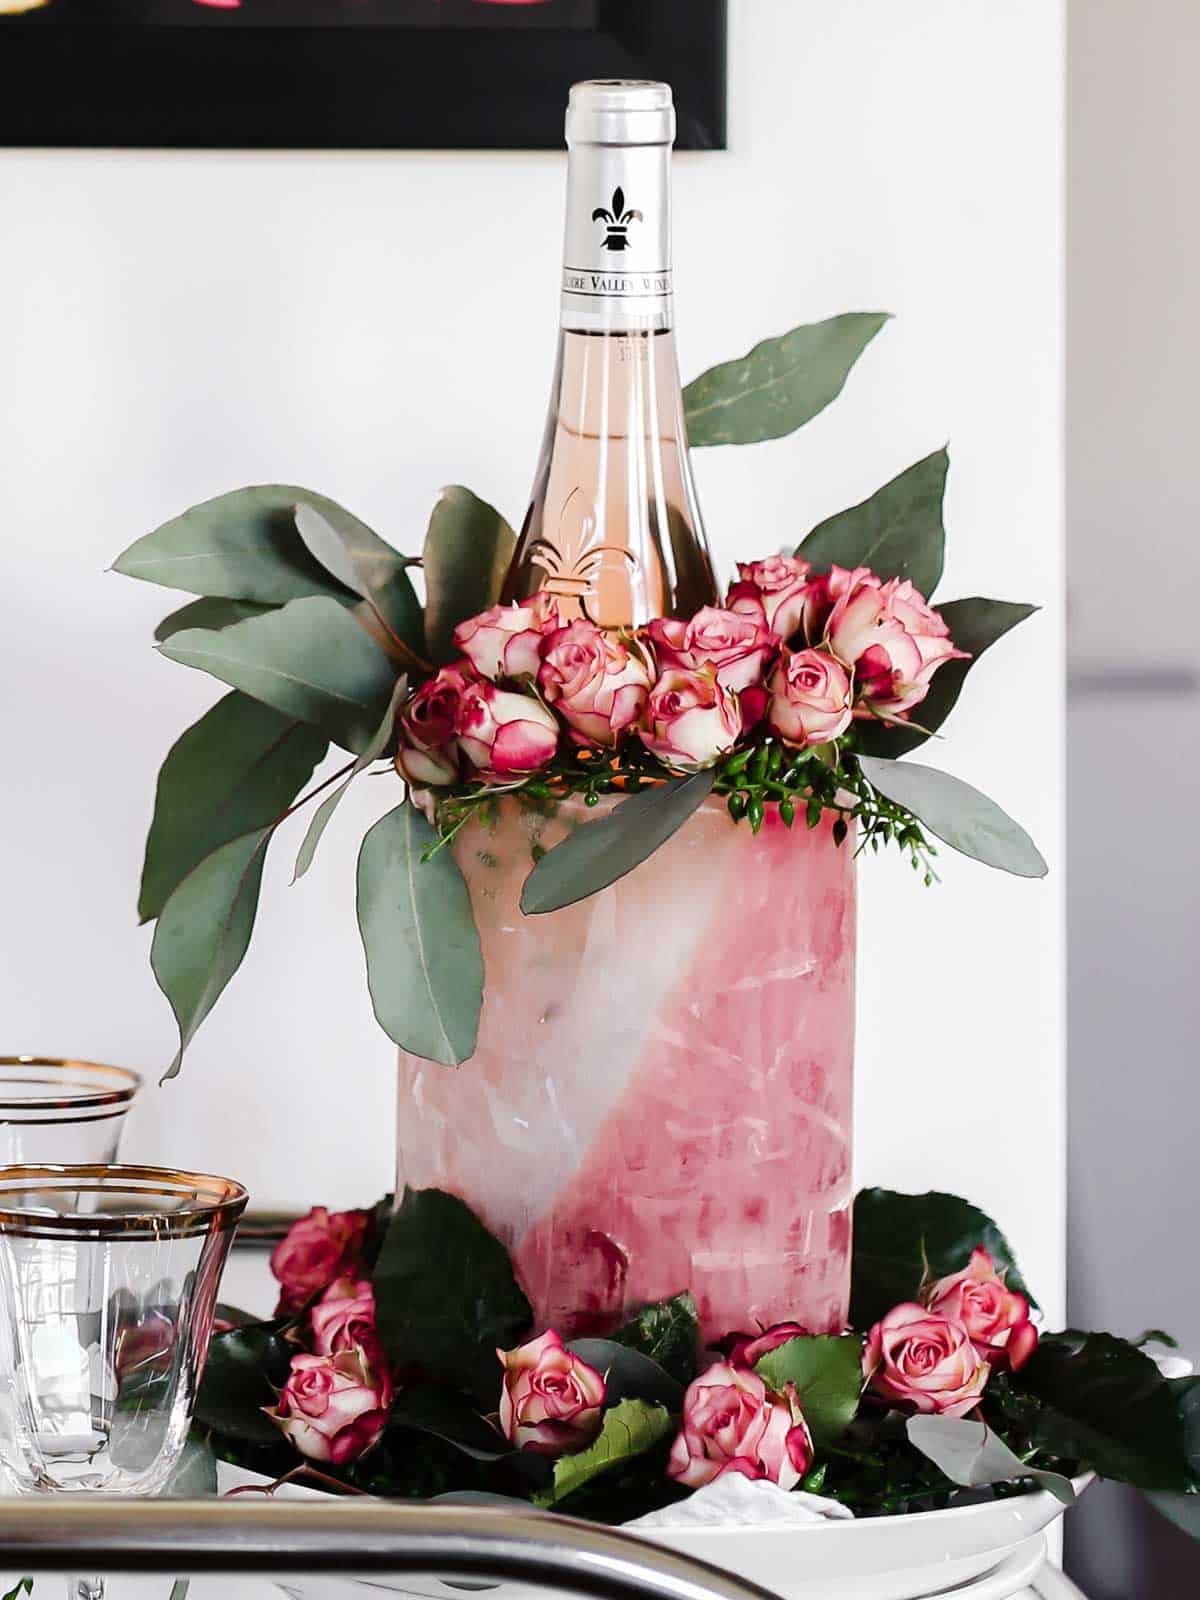
I’ll start with making a mold to hold champagne, wine, or other bottled drink.
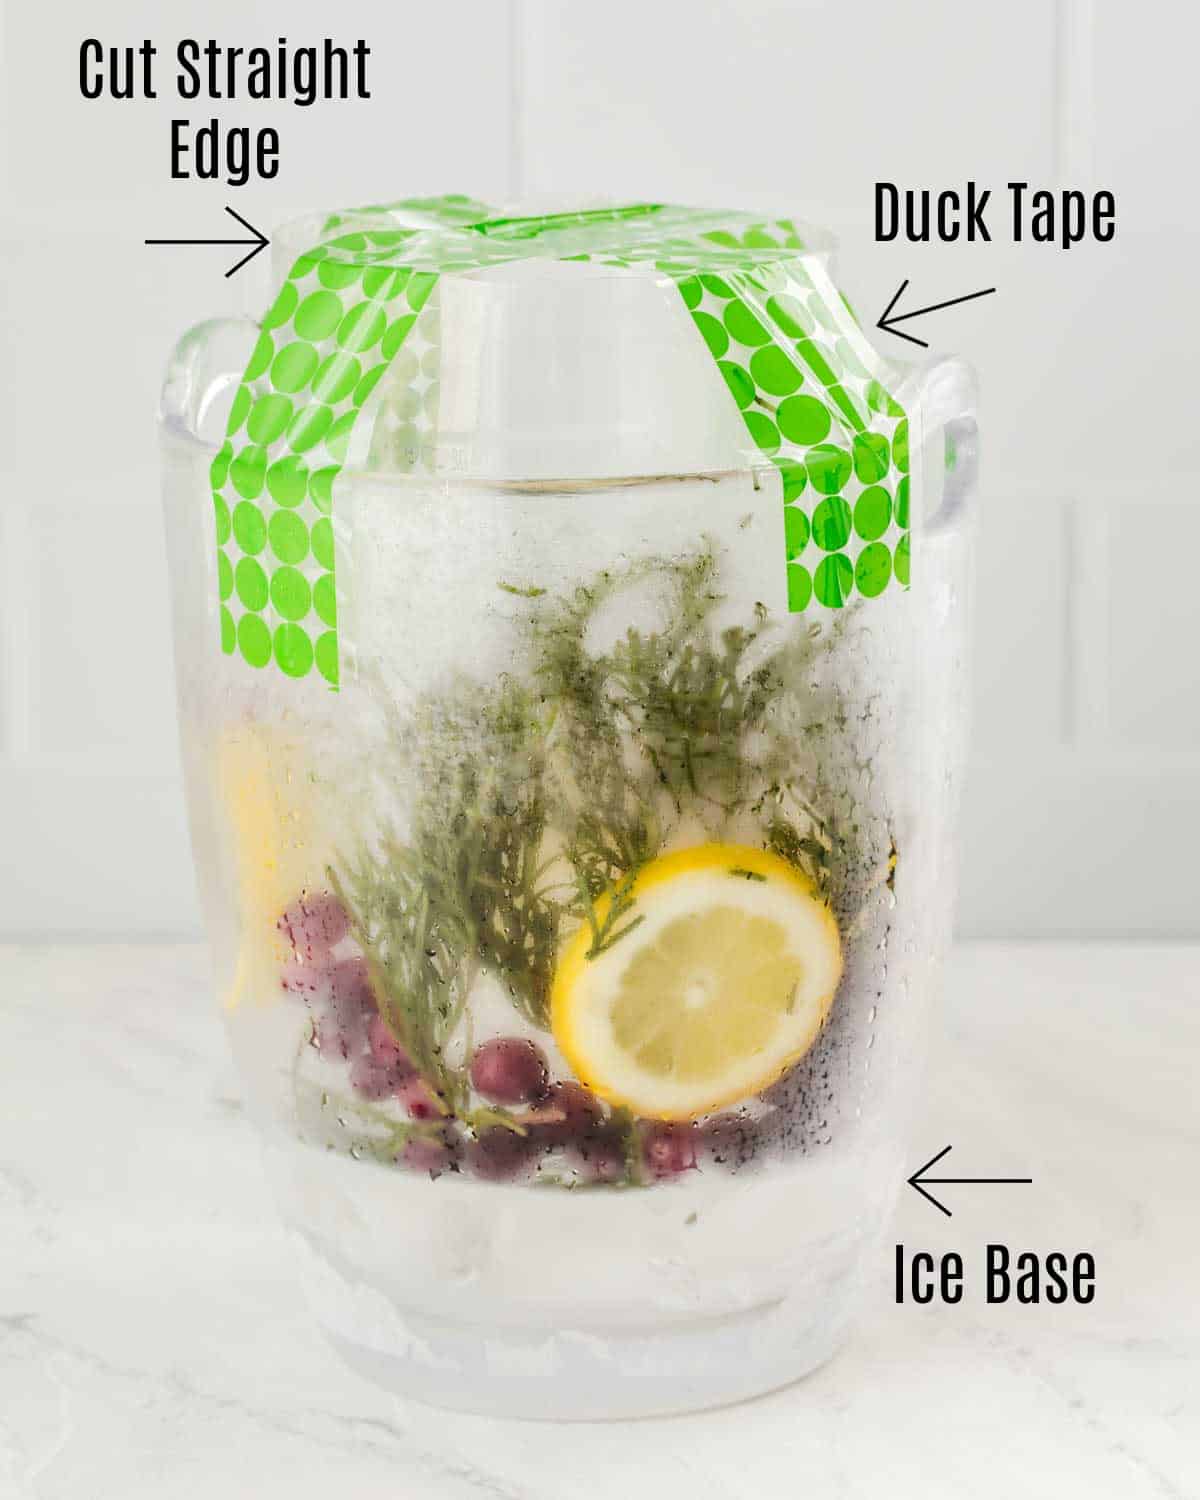
- Start with a small bucket that is larger around than a 3-liter bottle (I used a plastic ice bucket here). Fill the bottom with an inch or two of water and freeze until solid. This will be a stable base when it’s removed.
- When the base is frozen, set your smaller empty container inside on top of the frozen base (I used a 2-liter empty bottle with the top cut off here). Use the duck tape or heavy rocks/beads to hold it straight and in place. Add filler ingredients to the space between the large and small vessels, and top them with water. You’ll work in layers so you add just enough water to cover the decorative filler. Freeze until solid.
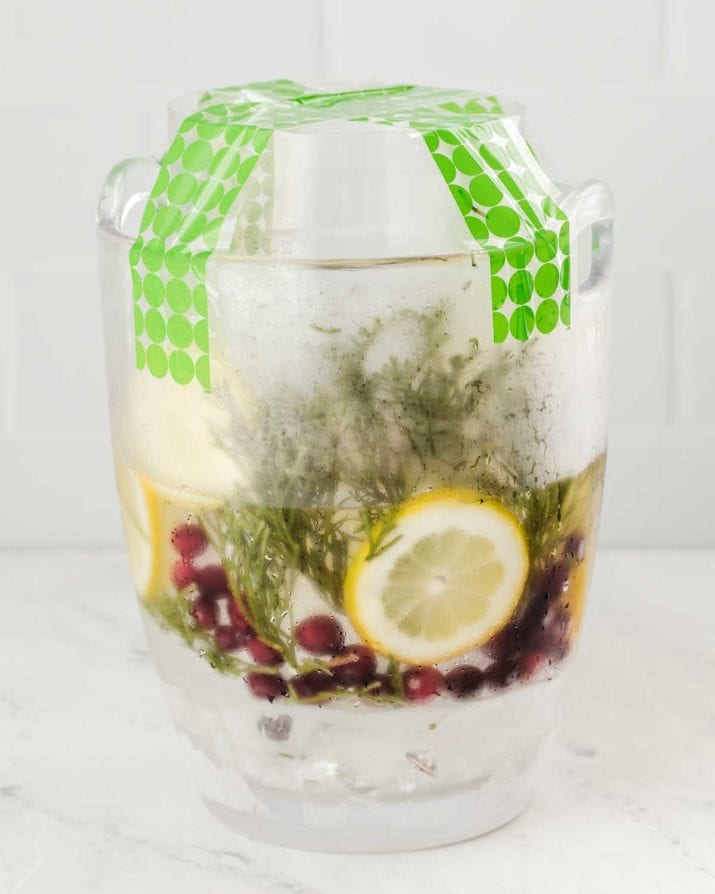
- Once the first decorative layer is frozen you can add your next layer in the same manner, filling with water enough to cover the ingredients. This layer should take you to the top of the mold. Freeze until solid.
- Once the cooler is completely frozen, take it out of the freezer so it can thaw slightly, about 30-40 minutes. Start with the inner container first, and fill it with lukewarm, NOT HOT water. Let it sit for a few minutes to warm the ice mold enough so you can pull out the vessel; you’ll give it a twist to help loosen it. Then you can dip the larger bucket in lukewarm water to help ease it off. Holding it under running warm water can help this process go more quickly.
- Once you have the ice cooler out of the container, store it in the freezer until ready to set on your bar.
With this method you should have an empty center that’s large enough to hold a bottle of champagne.
You could also follow these steps using a 3-liter bottle for the outer vessel and an empty wine or flip top bottle for the inner vessel. You can remove the empty wine bottle and replace it with a new wine bottle, where it should fit snugly.
If using a flip top bottle you can simply fill it with juice or punch using a funnel. You don’t even have to remove it from the mold!
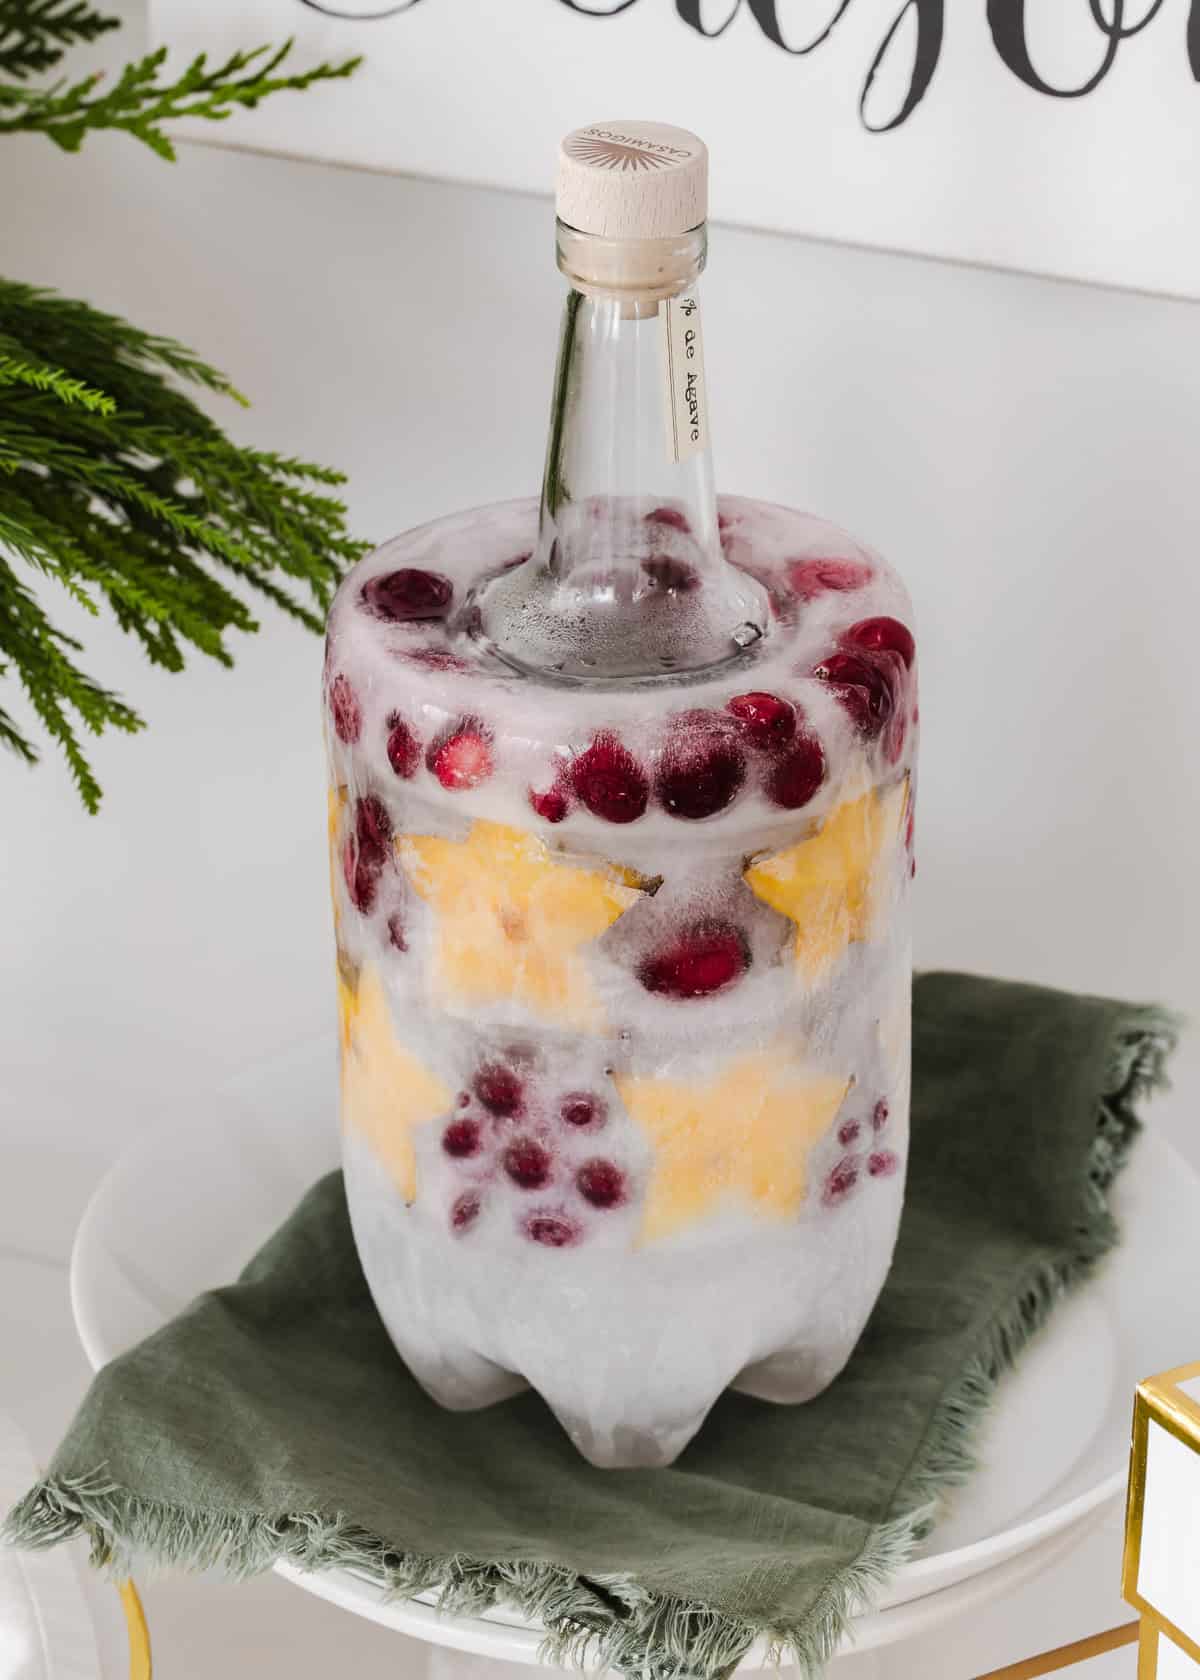
Version 2 – With Liquor Bottle
Bottles of liquor such as vodka, tequila or gin are great for this method since they’re delicious when chilled, and they don’t freeze solid.
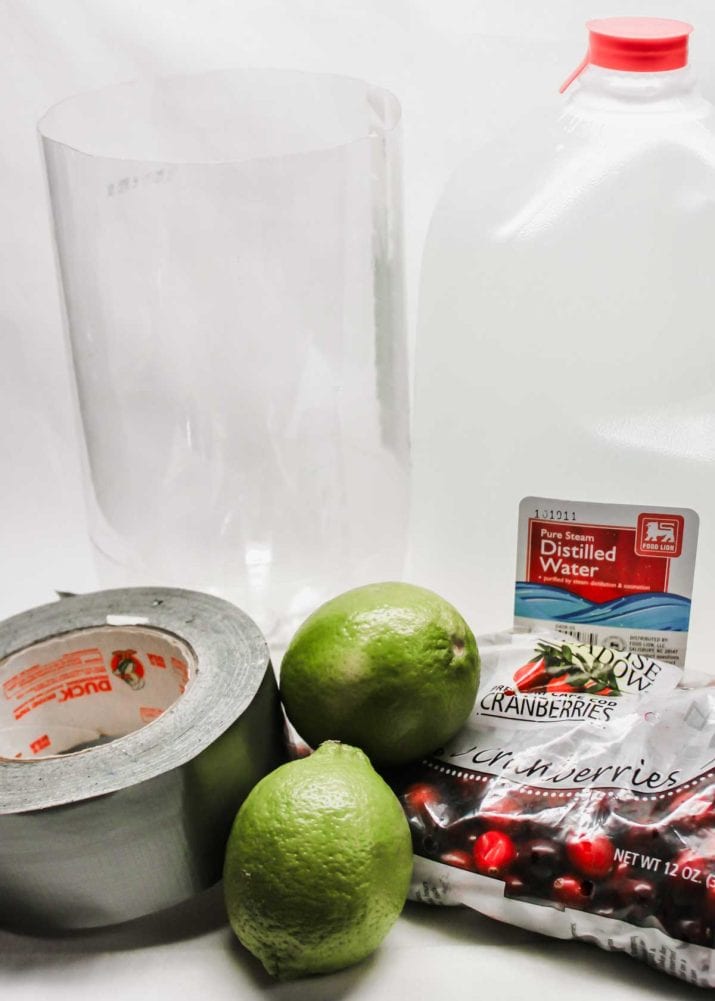
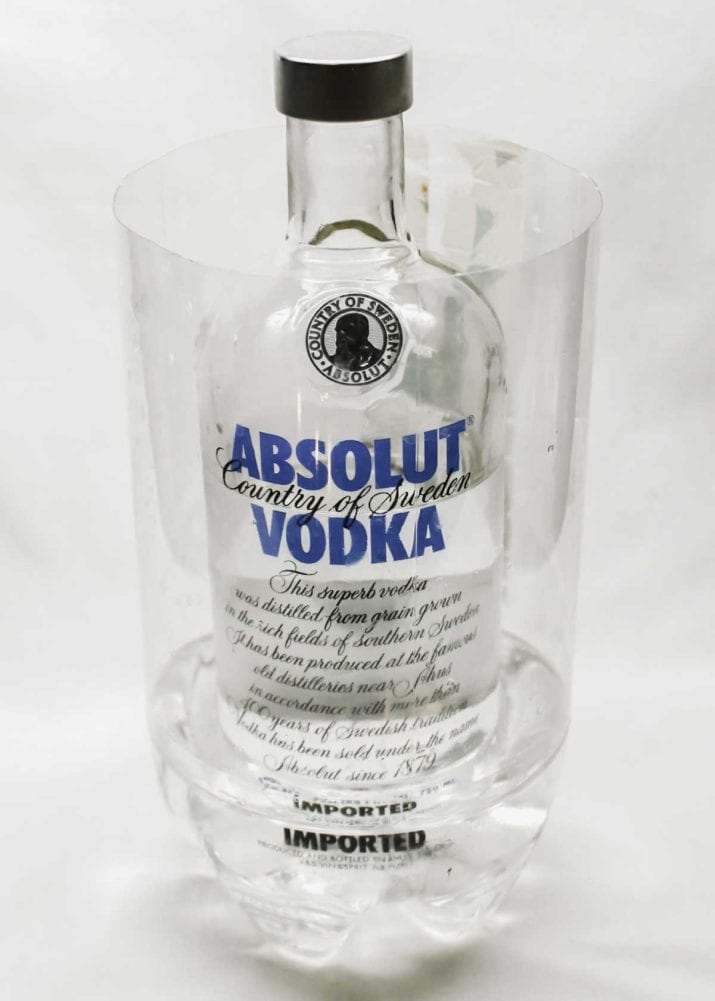
- Here I used distilled water and I think you’ll see in the finished result that it doesn’t really make a different in the final outcome. Place the bottle of liquor inside the 3-liter container and fill with an inch or two of water. Freeze until solid.
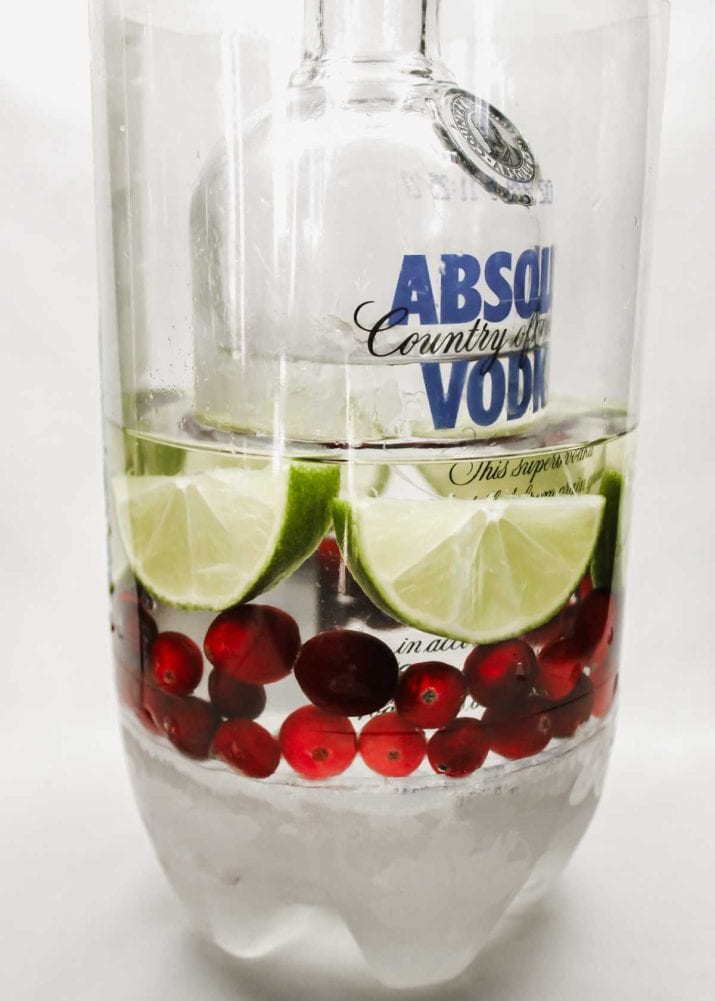
- When the base is frozen you can begin adding sliced fruit or berries around the bottle and fill with more water to just cover the fruit layer. Freeze until solid.
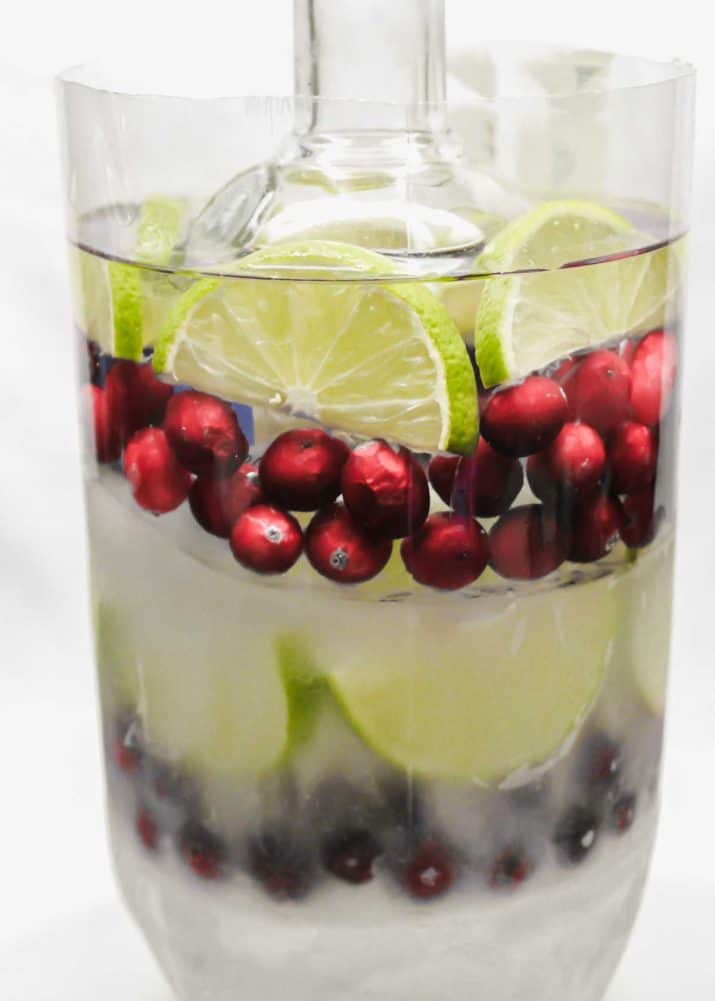
- Once the first fruit layer is frozen you can add your next layer in the same manner, filling with water enough to cover the fruit. This layer should take you to the top of the liquor bottle. Freeze until solid.
- Once the mold is completely frozen, take it out of the freezer so it can thaw slightly, about 30-40 minutes or enough to work the 3-liter container off of the ice. You may still need to dip in lukewarm water to help ease it off.
Once you have the ice cooler out of the container, store it in the freezer until ready to set on your bar.
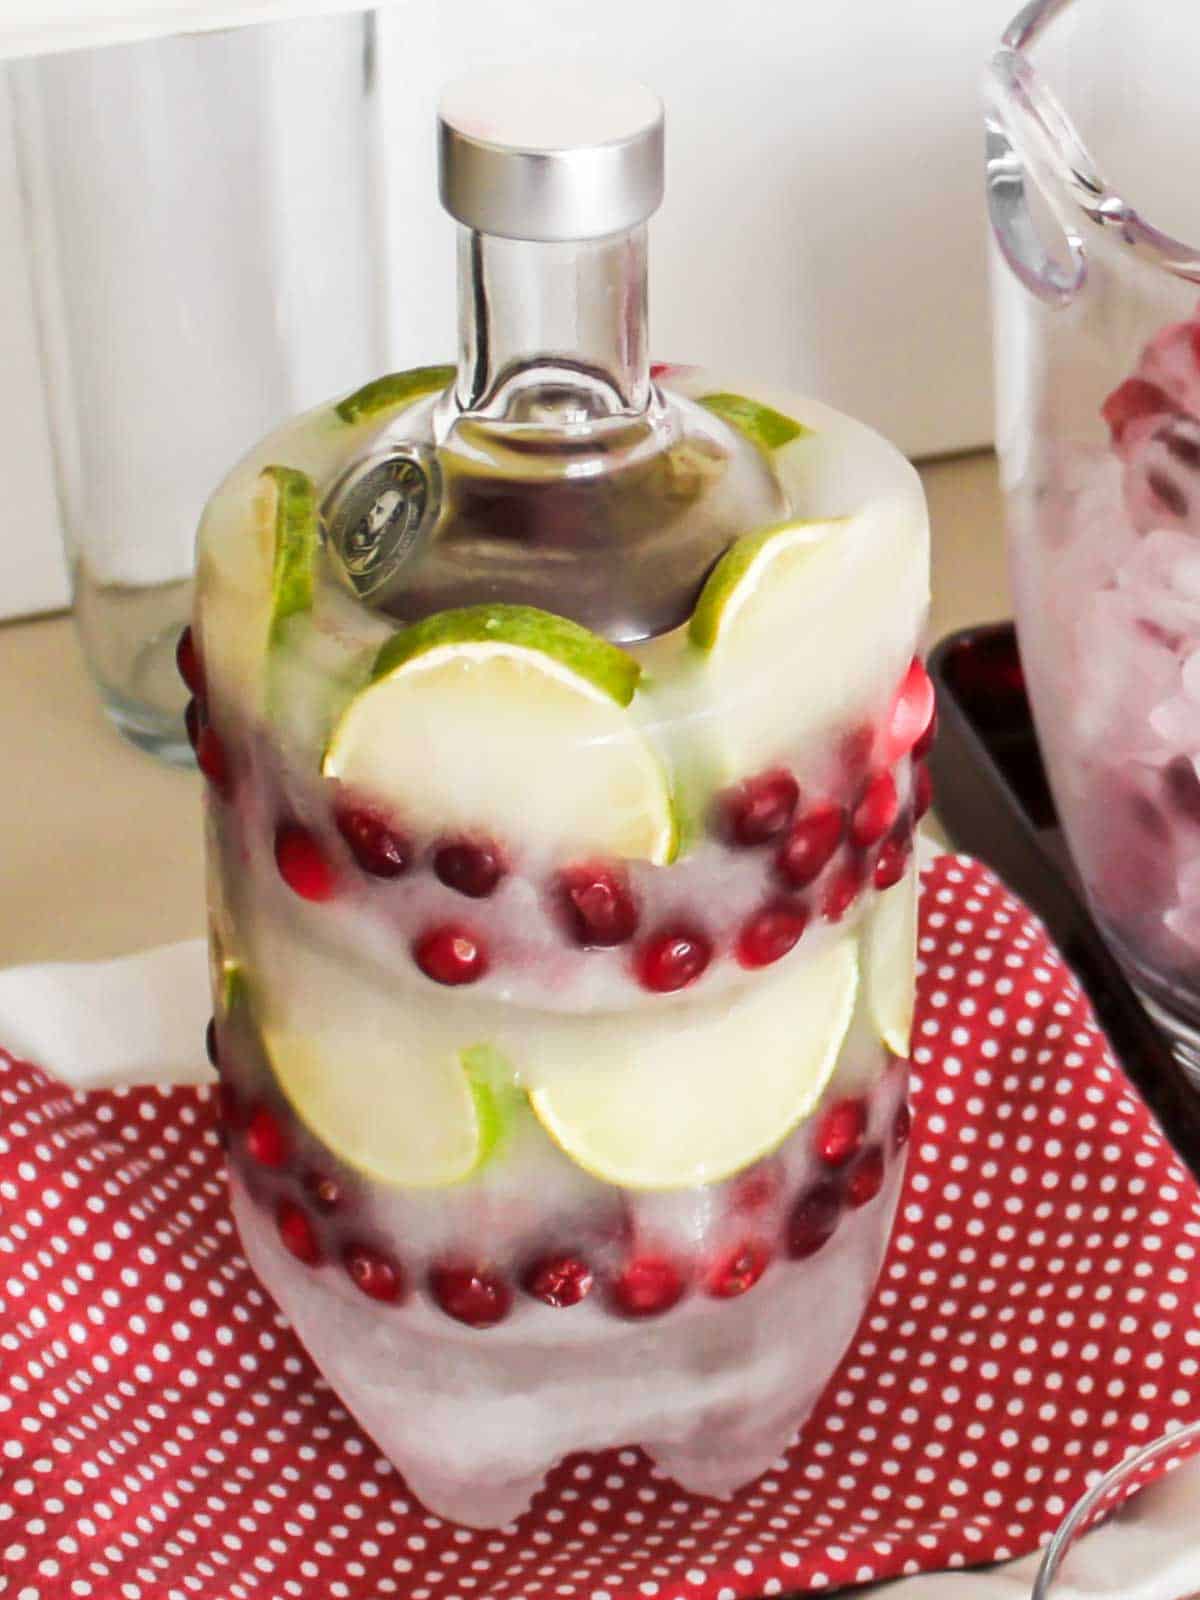
You can pour a drink using the neck of the bottle to hold on to. You may want to tie a linen napkin around the neck if you feel you need a barrier from touching the cold ice.
Fun Filler Ideas
Change up the decorative filler items to accommodate your theme. Here are some ideas.
- Add cranberries, citrus slices, and cut evergreens for a Christmas theme.
- Use fresh flowers to dress it up for birthday celebrations or Mother’s day gatherings.
- Place small shells inside for a coastal theme or beach theme party or shower.
- Add colorful layers with food coloring. Freeze each layer before adding the next color, and make an ombre effect or a rainbow of colors.
- For new years eve you can even add in tinsel and glitter.
- Surround the ice chiller with at garland or wreath of fresh flowers or leaves.
Important Tips and Tricks
- I’m going to bust a myth right here and now. Using distilled water or boiling water does NOT make the ice mold noticeably clearer as you can see for yourself in the two molds above. I’ve tried all those old wives tails and the results are marginal at best. There is a science to freezing water that comes out clear, but it doesn’t work for this project. My advice, save your money and time and use the tap water.
- When I first started making these I was discouraged by the fact that adding water to the mold made the filler decorations float to the top. That’s when I created this method for making a sturdy and decorative ice mold by freezing in layers rather than trying to do it in one session.
- Do NOT use hot water to remove the mold or it can crack the ice. Use warm or lukewarm water.
- Make the mold several days ahead and make sure you remove it in advance of your party. The last thing you want is to be spending time removing the mold while the party is about to start! The finished ice mold can sit in the freezer for about 2 weeks before it starts to evaporate.
- When setting the ice cooler out on your bar, set it in a shallow dish or tray that’s lined with a small towel or napkin. This will prevent the icy base from slipping around on the dish, as well as help contain or soak up the melting ice.
- When you first take the mold out of the freezer it will be frosty and less clear. As it sits at room temperature the frost will give way to a clearer finish.
- Under normal home temperatures this should last a few hours. The thicker your ice layer, the longer it will last.
I encourage you to make this DIY ice mold the next time you want to add a special touch to a party or celebration. It’s easy, it’s eye catching, and it looks impressive!
If you like this post, PIN, Share, or sign up for our Newsletter at the top of the page. And don’t forget to follow CAH on Instagram or Facebook. Cheers!

Putting salt in the water makes it defrost slower than useal
I saw something else on pinterest that showed if you boil the water before you freeze it, it will freeze clear. 🙂
I’ve heard that too but not tried it yet. If you use distilled water (which I did) it’s SUPPOSED to freeze clera also. As you can see it’s not really…. 😉
I make clear ice cubes w/ edible flowers using boiling hot water poured into ice cube trays (and they come out crystal clear). So I’m going to try this by applying the same principle and see if it comes out less cloudy! Can’t wait to try it!
Is it easy to serve the drink with this cooler on it ? It looks frozen around the Vodka bottle.
Shanna, the ice is actually frozen onto the bottle so when you serve/pour, you are lifting the entire thing. Very easy – just remember to leave enough room around the bottle neck to pick it up. This also makes it important to use the towel underneath so it doesn’t slip & slide as you place it back down.
Genial!! love it!!
LOVE it!!
Argh wish I saw this at the beginning of the month! It's a fabulous idea!!!!
LOVE it! You're a party planning genius! 🙂
What a fabulous idea…although I might have to wait a few months to try it…it's Summer here in Australia and the ice would melt within minutes of hitting our hot Summer air. It's definitely on my Winter To-Do list!! Thanks so much for sharing xx
This is awesome! It looks great!
What a good idea! I am going to share with my friends!Here in Brasil our weather is too hot. This is gonna be something fabulous to keep our drinks beautiful and cold!
DUDE!!! I've tried this 100 time and my fruit always floated to the top! Never thought to freeze and add, freeze and add!!!! GENIUS! This is me bowing down to your awesomeness! 😉
Genevieve
this is really such a great idea! amazing because anyone can do it, and its so inexpensive but looks so stylish!
love love love!
So festive!! Love that you used the limes and cranberries! Kerri
Chris that is fabulous!!
Absolutely genius! Love it!
I love this Chris! So festive and such a neat idea!
I just love it! My uncle brought me a Orange Absolut and for sure I´m going to to it in the New Year!!!!!!