Keys To Success Dessert Table theme
You’re going to LOVE this Keys to Success dessert table! This graduation party dessert display includes easy diy sweets and decorations. It’s all part of an Anthropologie-inspired Keys to Success graduation party decor. This is everyone’s favorite – dessert!

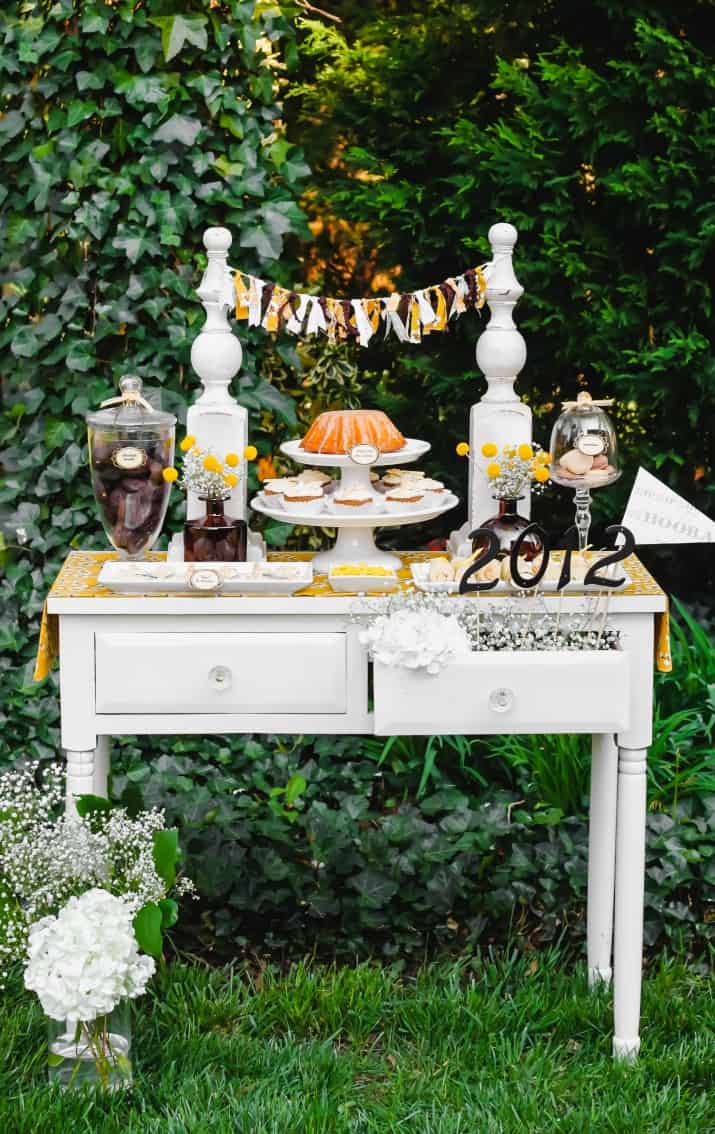
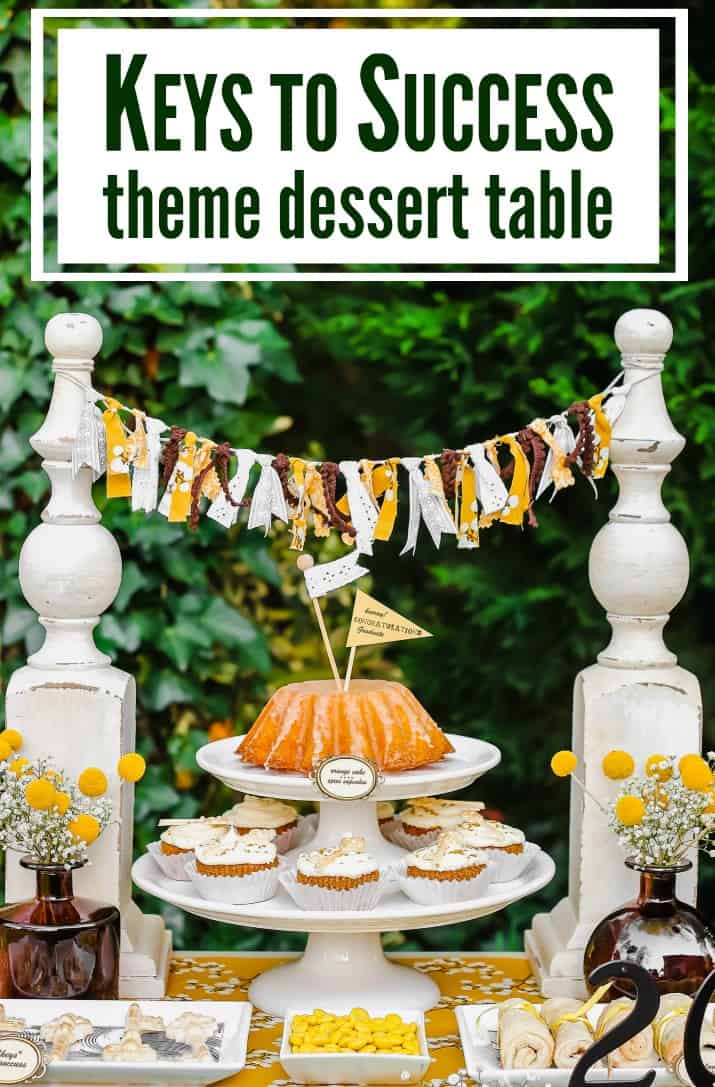
As with most of my dessert tables, it’s filled with homemade sweets, a few special garnishes, and a sprinkling of store-bought items to round out the selection. The styling was a lot of fun to do. I knew I wanted to work with the 2 wooden post-finials, and the tiny metal frames as food markers.
I think it all came together the way I envisioned in that shabby chic Anthropologie style. And I love the way the golden yellow pops against the neutrals of brown and cream/white.

Tips to creating a Keys to Success dessert table
-
I used the gold fabric as a table runner. This adds color and helps to tie in to the rest of the party spaces. Use pinking shears to cut the fabric for a no-sew way to keep the fabric from fraying.
-
The tall wood finials create a great focal point to the center of the table. I strung a mini diy fabric swag between them and used a mix of patterned fabric, lace ribbon, printed ribbon, and textured trim. This application creates a backdrop to the open space.
-
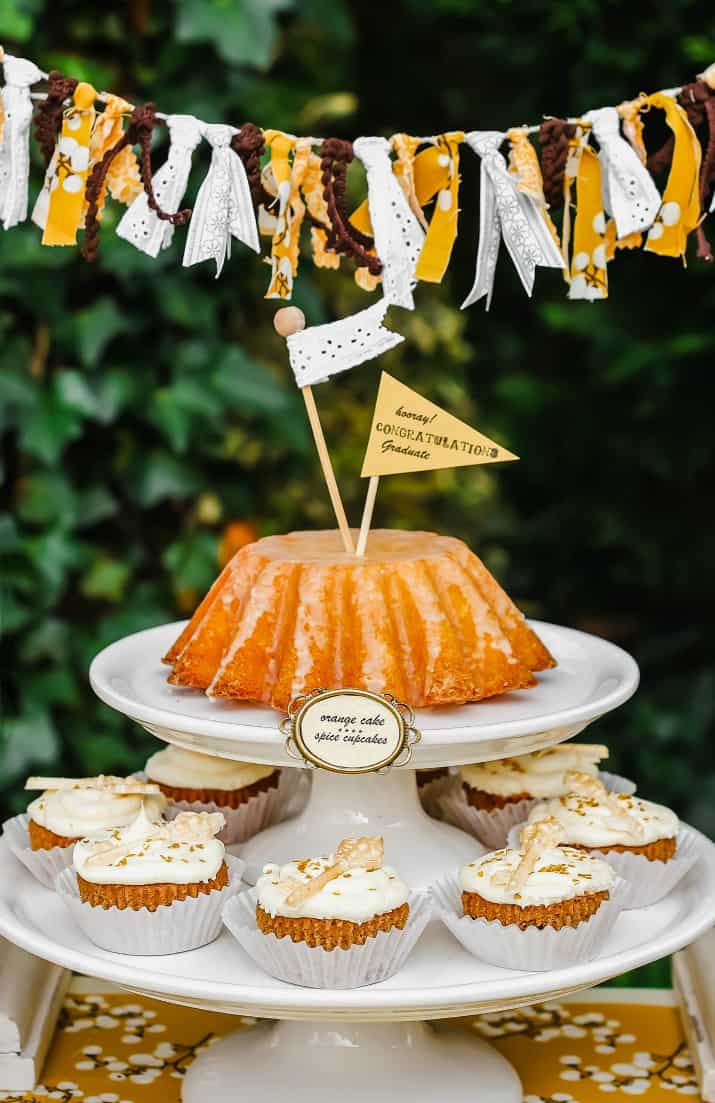
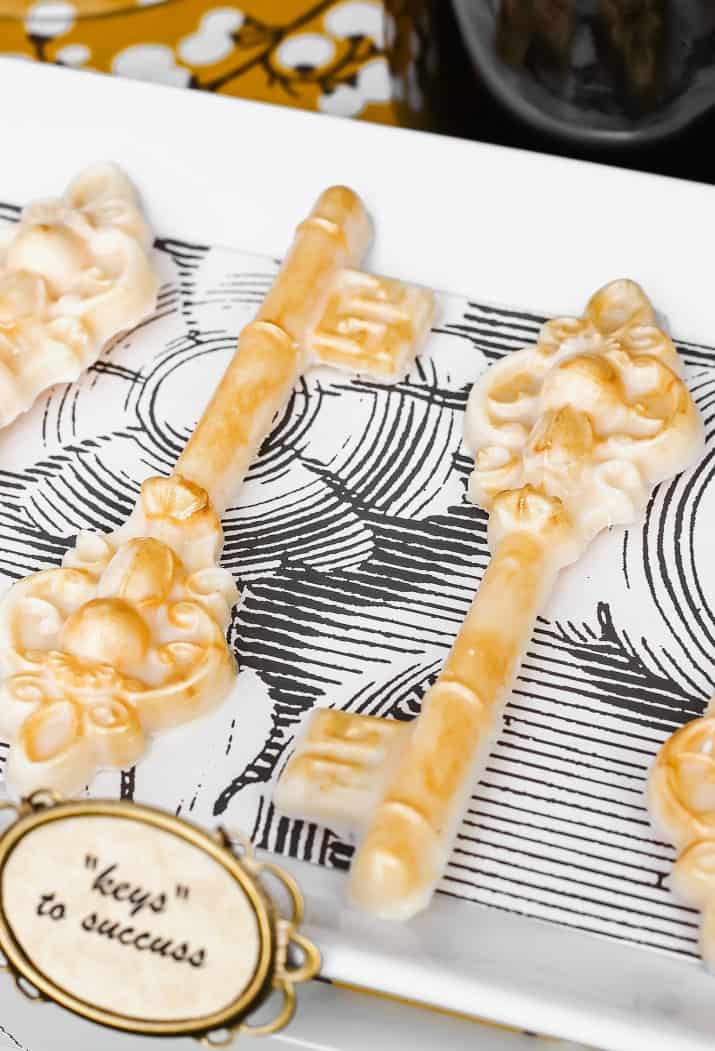
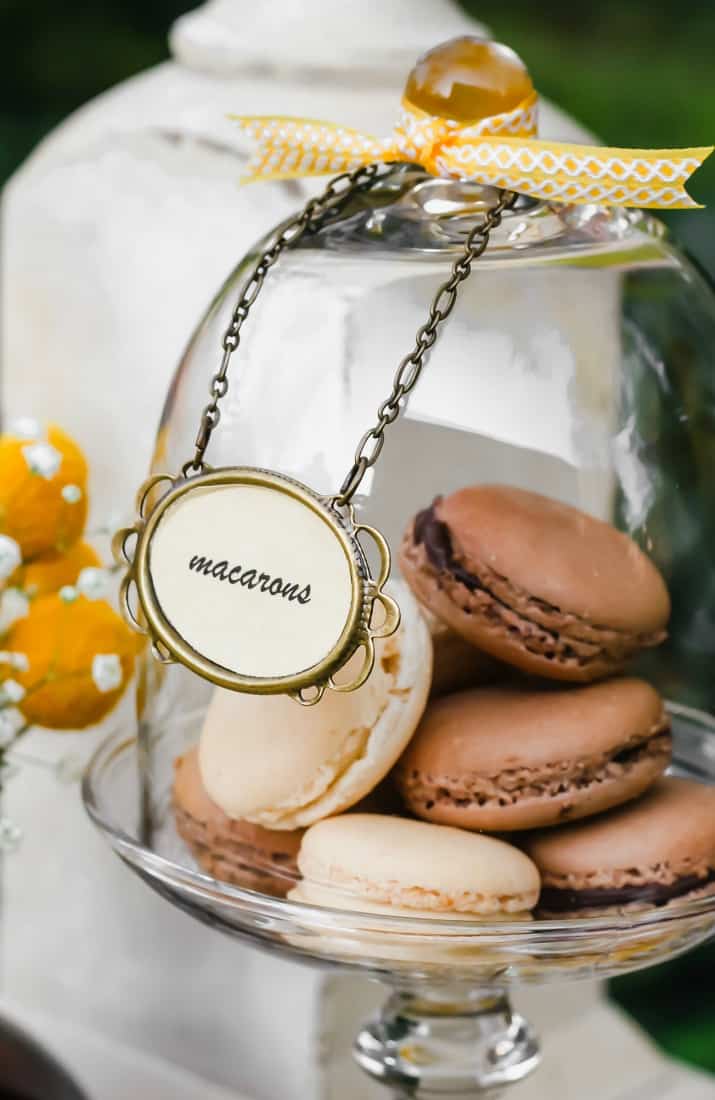
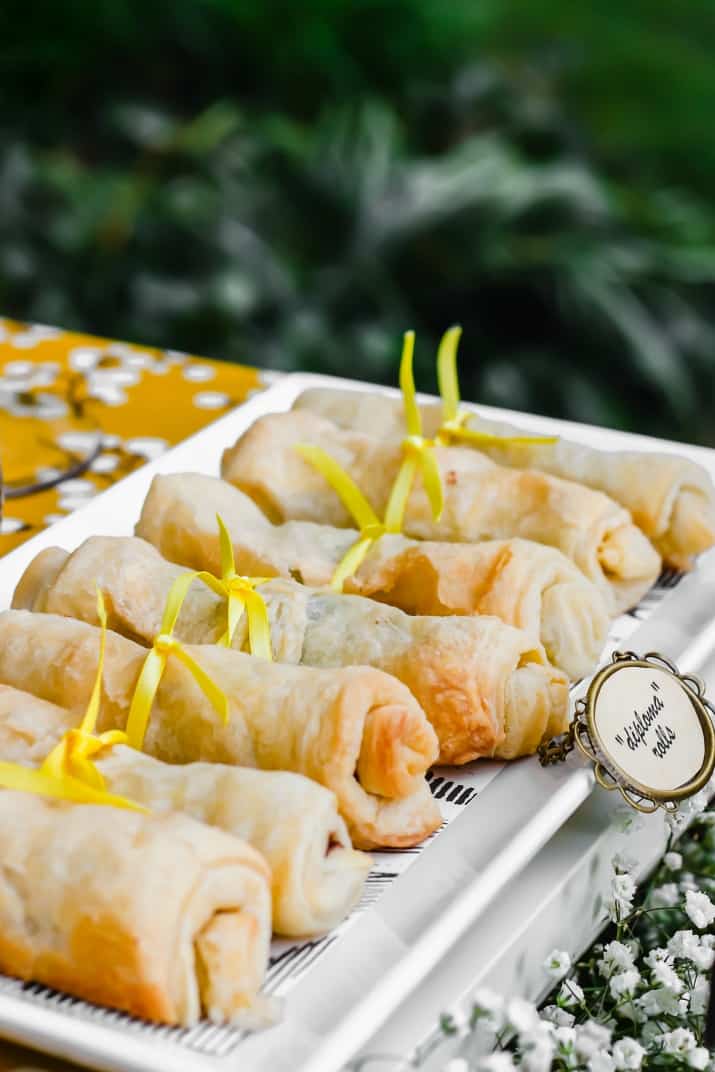
Homemade desserts consist of chocolate chip spice cupcakes topped with mini white chocolate keys, “diploma” chocolate filled pastry rolls, large white chocolate key molds, and an orange glazed cake baked in a fluted pan to add interest. To round out the table I added chocolate donuts, macarons, and yellow m&m’s.
-
Use a key shaped candy mold to make the white chocolate keys. Add edible gold dust to give them a textural aged look. Coat the mold forms with gold dust before pouring in the melted chocolate. Finally, tie the puff pastry rolls with gold ribbon to mimic diplomas for a graduation celebration.
-
The food markers are an easy diy project using small metal frames from the scrapbook section. I added long chains from the jewelry section to 2 of them so they would hang from the jar lids. I applied the others to the dishes using Glue Dots.


How to decorate a graduation dessert table
-
Plain white dishes are used to display food, and vintage-style paper liners were used to line platters. These printed papers coordinate with our place mats from part 1 of this graduation party keys to success seated luncheon table.
-
I think flowers are a necessity at almost every party and I used the same style arrangements as the seated table, this time using brown vases for contrast.
-
An open drawer provides the perfect home for a large hydrangea and babies breath, as well as house numbers to represent the “class of” year. Apply house numbers from the home improvement store to long wooden skewers using Glue Dots. Insert them into a foam block covered with green moss. Add a printed pennant to the arrangement.
-
Finally, embellishments were added to the orange cake with a small pennant and ribbon flag.
I Hope you gather some ideas and inspiration from this dessert table, and see how easy it is to pull together something pretty without a ton of money.


I have searched high and low for finials/posts like the ones pictured here. I want to duplicate them and have run out of ideas. Any suggestions of where I can find something similar?
Hi Marci, have you tried Home Depot or Lowes? ….of maybe substituting tall pillar candle holders? I found these as HomeGoods a few years ago.
Amazinggggggggggg decoration 😉
Thanks for stopping by. Glad you liked it! 🙂
I am interested in receiving information on becoming an event planner.
Love this classy setup. I haven’t ever seen the wood finial idea and I LOVE it. Genius. Seriously.
Thank you ladies! I appreciate your sweet comments ; )
Chris this is just wonderful! The details as ALWAYS are beautiful! XO
Wow Chris I love this beautiful I will pin on pinterest. I saw part one and love the table setting, the colors. Amazing job.
Best wishes