• Skip to primary navigation
  • Skip to main content
  • Skip to primary sidebar
  • Skip to footer
  • Blog
  • Entertaining
    • Dinner Party Menus
    • Themed Dinner Ideas
    • Tablescapes
      • centerpieces
      • floral
      • candle
    • Cocktail Parties
    • Buffet tables
    • Designing Dessert Tables
    • Tips & Tricks
  • special occasions
    • Birthdays –>
      • for Adults
      • 1st birthday
      • for Girls
      • for Boys
      • for Teens/Tweens
    • Bridal shower
    • Baby shower
    • Engagement / Anniversary
    • Weddings
  • Seasonal | Holidays
    • Winter
      • super bowl
      • Awards Night Party
      • Valentine’s Day
      • St. Patricks Day
      • mardi gras
    • Spring
      • Easter
      • Graduation
      • Cinco de Mayo
      • Kentucky derby
      • Mother’s Day
    • Summer Entertaining
      • Father’s Day
      • 4th of July
    • Autumn
      • School Days
      • Football parties
      • Halloween
    • Holidays
      • Thanksgiving
      • Christmas
      • New Years
  • by color
    • black
    • blue
    • brown
    • gold
    • gray | Silver
    • green
    • orange
    • pink
    • purple
    • red
    • white
    • yellow
    • neutrals
    • multi color
  • Food & Drink
    • cocktails & drinks
    • appetizers & snacks
    • main dish
    • side dishes
    • sweets
    • brunch
    • Food Presentation
    • the Bar
  • DIY
    • Projects
    • Printables & Freebies

Celebrations at Home

Inspiration for Stylish Entertaining

  • About
    • Disclosures
    • Privacy Policy
  • Let’s Work Together
  • Food Photography
  • contact
  • SHOP
  • Nav Widget Area

    • Email
    • Facebook
    • Instagram
    • Pinterest
    • RSS
    • Twitter

Subscribe for Email Updates

You are here: Home / CAH Styling / DIY :: Iron-on Transfer Sign with FREE Template

DIY :: Iron-on Transfer Sign with FREE Template

diy iron-on LOVE sign with free template #diy

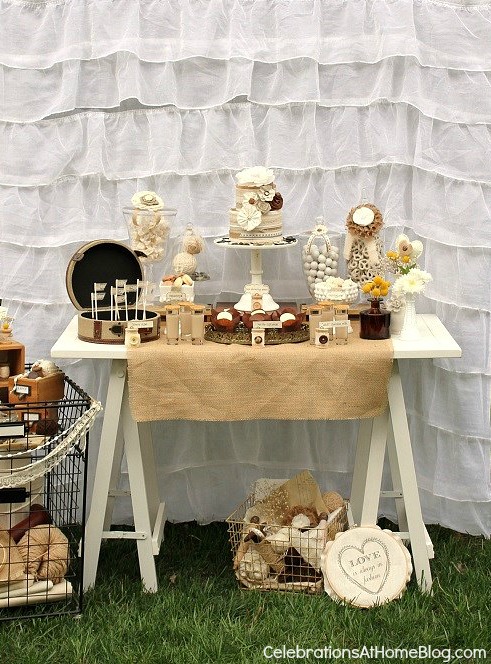
I’m revisiting one of my favorite projects today – my shabby chic fashionista bridal shower shoot {what a mouth full!} that I did last year.  You know sometimes I have intentions to share more details about a project but then other things come up or the seasons change or holidays come….  Anyway, I’m talking about my diy iron-on transfer “love” sign and I’m even providing the template for you for FREE!

Even though this sign was made with a specific theme in mind, the sentiment and idea would work for ANY bridal shower, engagement, or wedding.  The saying, “love is always in fashion” is pretty universal so have fun with it.  Also, the “frame” I used fit the theme {an embroidery hoop} but you can just as easily place a piece of fabric in a picture frame and display it on a table or hanging on a wall or backdrop.  Are you ready to get started?!

LOVE sign #diy iron on transfer paper for light colors

Iron-on Transfer LOVE sign

Supplies:

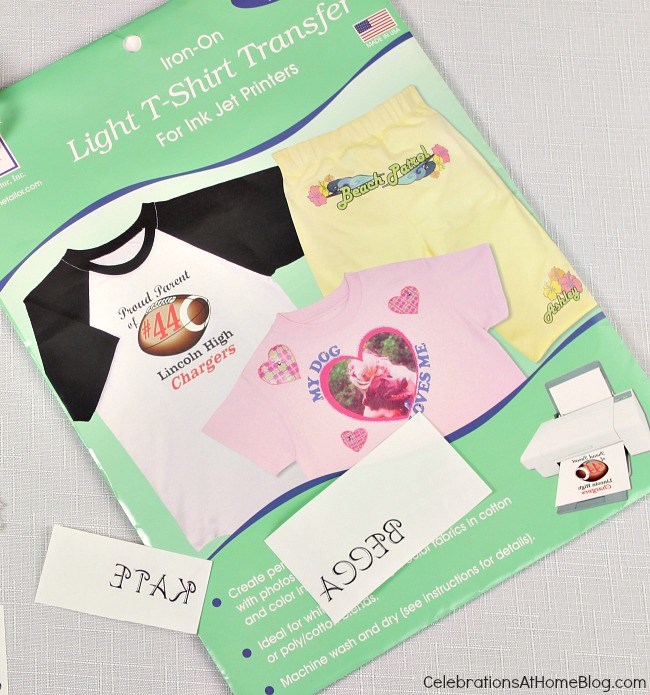
  • Iron-on transfer paper for ink jet printers {I used for light fabric version}
  • Light colored cotton fabric, cut to size and ironed – my template is sized for an 8 x 10 frame or 9-inch embroidery hoop
  • Printed template {in reverse format} provided
  • Iron

Begin by test printing the template on a plain piece of paper if desired.

Insert a sheet of transfer paper into your printer so that the printing will occur on the plain, unmarked side of the transfer sheet.

Print image and allow to dry for 30 minutes before transferring.

Cut out your printed image from the transfer sheet, leaving a narrow border around the edge.

Preheat your iron to the cotton setting, and set up a hard surface to iron on.  I used a marble cutting board.

Place a pillow case on the ironing surface and top with fabric.  Position your transfer, IMAGE SIDE DOWN, on fabric.  Use firm pressure and iron transfer onto fabric, using circular motions paying attention to the edges.

Remove paper backing and let cool.

BE SURE TO FOLLOW THE INSTRUCTIONS PROVIDED WITH THE TRANSFER SHEET KIT, FOR FURTHER DETAILS.

PIN this post

diy iron on LOVE sign

This project is a bit more unexpected than your typical printed signage, and I think it adds a uniqueness to your event.  Once you’re comfortable with the method you can begin to create your own templates and the sky is the limit!.  Wouldn’t it be fun to customize table cloths, napkins, even placemats this way!  How about drink markers or place cards?  I could go on….

Get your FREE template here and just save it to your computer until ready to use.

shabby chic heart download for iron-on transfers

You can see more of how this sign was used in the shabby chic dessert table here.

shabby chic shower


For more inspiration, follow me on Google+, Pinterest, and Twitter. Cheers!


Previous: DIY Ombre Style Gold-Glittered Bottle
Next: Story Book Themed Baby Shower {Guest Feature}

February 19, 2014 11:41 am Chris Filed Under: CAH Styling, DIY

Primary Sidebar


The most important thing about parties & entertaining is the guest list! Next, it should be delicious, beautiful, unique, and fun. Calling on my years of experience, I’ll show you how to pull it all together with style. Cheers!

Footer

Search the Site

Celebrations At Home is a participant in the Amazon Services LLC Associates Program, an affiliate advertising program designed to provide a means for sites to earn advertising fees by advertising and linking to amazon.com. All our thoughts and opinions are our own and we are not paid for or mandated to provide a positive review.

Categories

Archives

Tags

airplanes Alice in Wonderland art backdrops bacon birds books butterflies camping carnival & circus casseroles Chalkboard Ideas cheese cocktail party cookies fairy Fiesta frames French Chic GIRLS NIGHT IN hot cocoa & COFFEE ice cream Mexican Monkeys Moroccan Movie themes nautical nesting owls picnic pizza Princess pumpkin Quotable Safari & Jungle salad shabby chic soups & chili Sports tea party trains travel Western wine Woodland

© Copyright 2018 Celebrations at Home · Scroll to TOP · Log In · Hosted by Servously