Best Kept Secrets to Flower Arranging on a Budget
I’m sharing the best kept secrets to flower arranging on a budget, right here. Find out how easy it is to make floral centerpieces for home entertaining and parties, without spending a fortune!
How to Create a Beautiful Flower Arrangement
You guys! I’m sharing the secret to creating a fabulous floral centerpiece on a budget, and it will change the way you think about flowers.
How many times have you looked longingly at photos of a tablescape or an event and think, “yes, but those flowers must cost a fortune.” Well, they don’t have to and I’m going to tell you why.
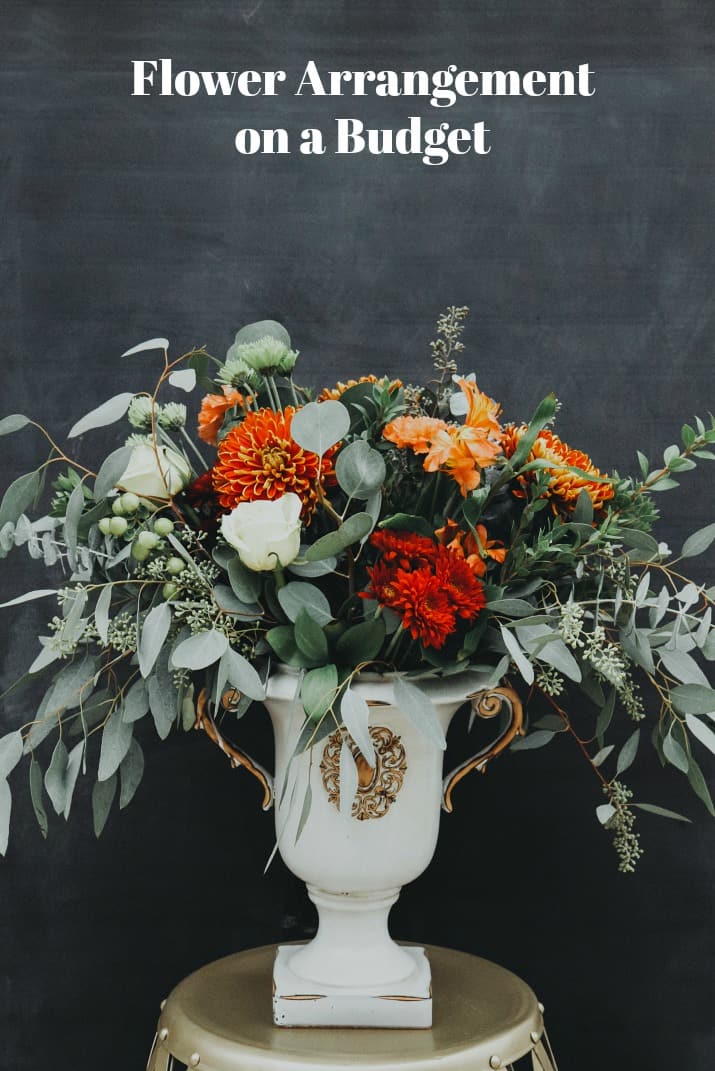
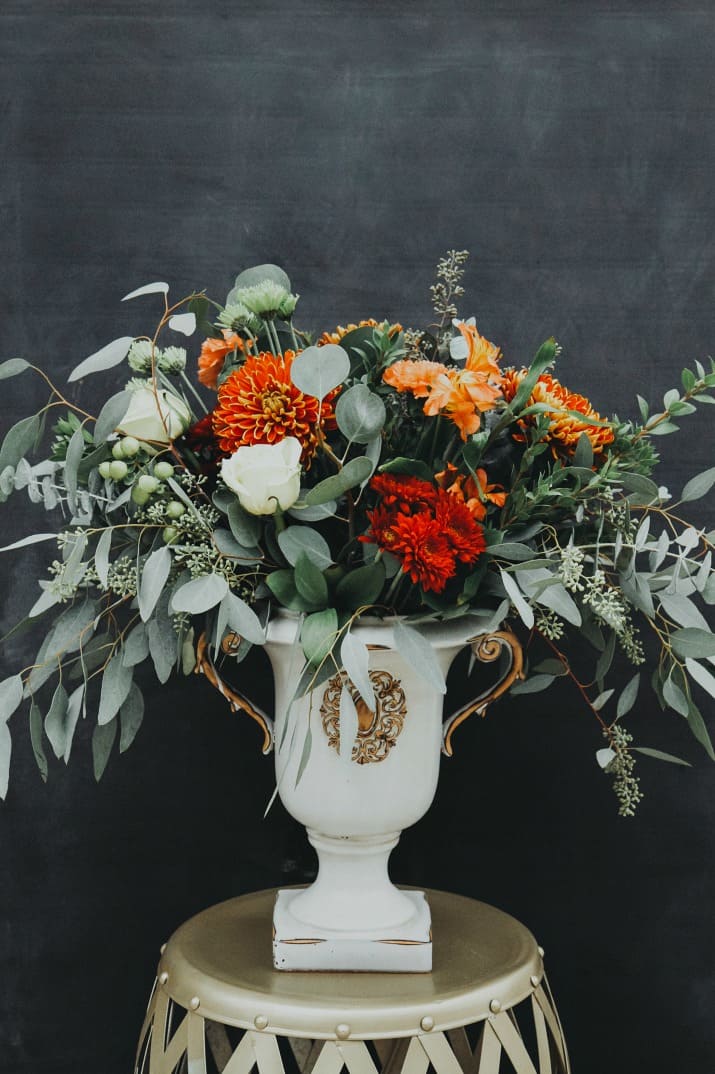
I’ll use this floral centerpiece from my Friendsgiving table setting, as an example.
The Secret to Flower Arranging
I uncovered these secrets to flower arranging through much observation, plus trial and error while designing tables. Plus, I’ve taken a flower arranging class which was so enlightening!
The big secret is….the greenery! That’s right; it’s all about using a higher ratio of greenery or filler, to flowers.
You’ll notice how full and lush this arrangement is, but the truth is it’s created from two bouquets of greenery, plus one bunch of flowers. A bouquet of greenery is about half the price of flowers so it’s going to save you money.
Best Greenery to Use
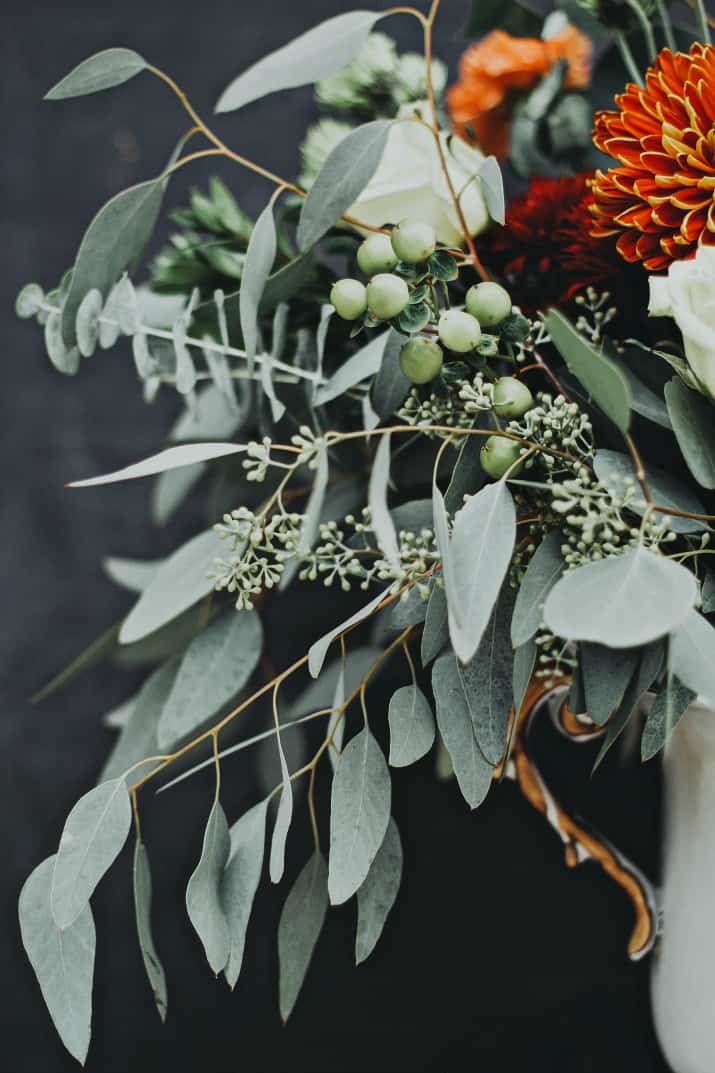
Greenery also adds a lot of architectural detail to an arrangement. These are my favorite fillers to use.
- Seeded eucalyptus
- Willow eucalyptus
- Silver dollar eucalyptus
- Hypericum berries
- Waxy leaf varieties like ruscus
- Bay leaves
Flower Centerpiece on a Budget
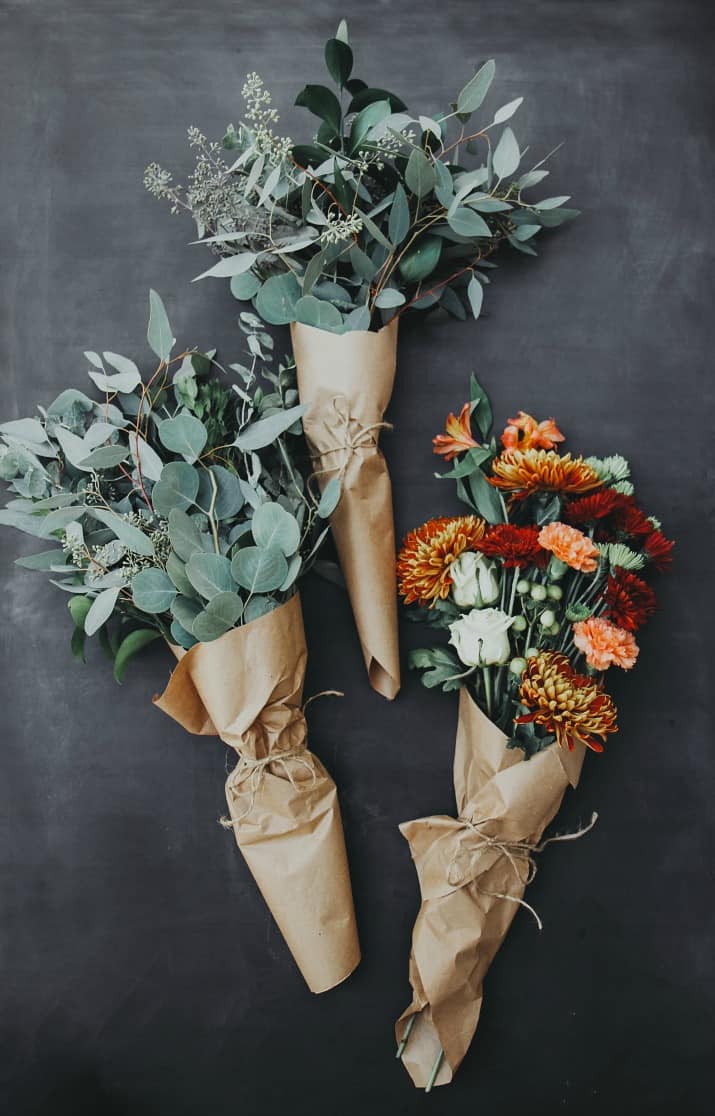
I purchased these flowers and filler at my local grocery store. Admittedly some stores have better selections than others, but you can also speak to the manager and have things specifically ordered.
You can use mixed bouquets of flowers for a “casual” effect, or a bouquet of roses for a more “formal” look.
Step By Step Instructions
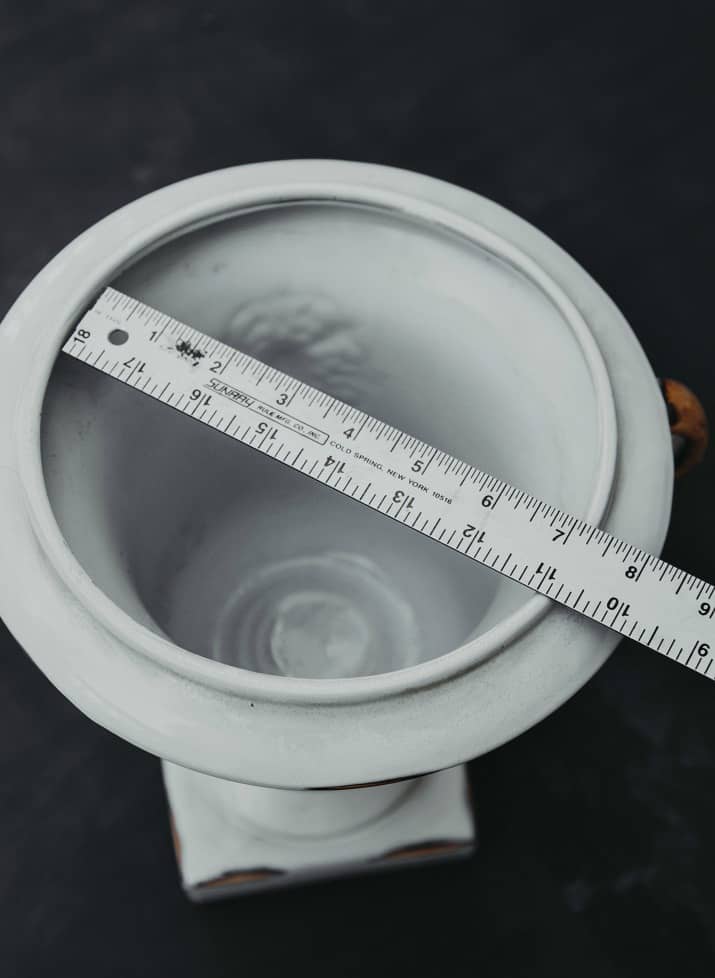
- STEP 1: Choose a vessel where the opening is not too large. This vase is 7 inches and that’s about as large of a circle as you would want to fill. If you’re using a low, oblong container like the one in my dining room update, it can be longer than 7 inches, but you would want it narrower than 7″ to even out the circumference. A low profile container such as that calls for using floral foam too, so the stems don’t fall out.
- STEP 2: Fill the vessel about halfway with water, and/or soak the floral foam until it’s saturated.
- STEP 3: When you’re creating the arrangement, fill the vessel with the greenery first and evenly distribute it allowing any flowing pieces to hang over the edges evenly.
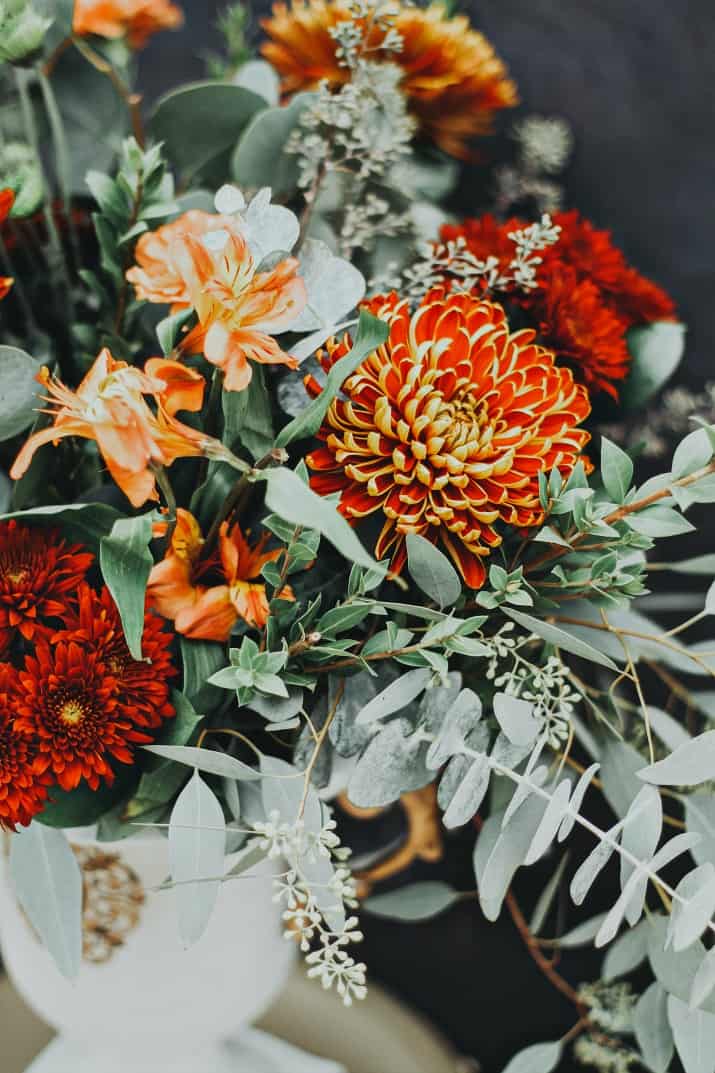
- STEP 4: Next, add in the flowers individually and deliberately. Space them out and cut stems shorter in the front and taller in the back or middle (depending on where you will place the centerpiece).
- STEP 5: If you still have a spot or two that needs to be filled in just go out into the yard and cut some fresh boxwood, holly, or evergreens and add it in.
That’s it! You now have a gorgeous, full centerpiece that you can place on your tablescape or buffet area.
More Tips
- Before I discovered this awesome technique I used another trick (and still do sometimes in a pinch). I would purchase pre-made flower arrangements, sometimes adding a small filler bouquet, sometimes not. Cut them down as needed and transfer them into my own vase to match the table. You can see examples of that in my pink party and my elegant outdoor Thanksgiving table.
- Sometimes I like to use this basic principle but purchase an additional stem or two of hydrangea. They’re usually so large that you can cut it into 2 nice sized heads and add it to your arrangement. This is great for when you need to cover more space or if you just want to add an interesting detail. You can see how I did this in my Wimbledon themed brunch party here.
- Admittedly this arrangement is “perfectly imperfect” which I love. It also works for a more formal look, as you can see in the beautiful centerpiece of roses in this anniversary party.
I’m telling you, when I figured out this trick of the trade it was like magic. No longer do I feel intimidated, or like I don’t have the budget for a show-stopping centerpiece.
If you need a larger arrangement, simply use the formula and add in one more bouquet of flowers. It’s still going to be less expensive than paying a florist to do it!
More Centerpiece Ideas
Find more ideas for your seasonal tables with these tips.
- Christmas centerpiece ideas
- Fall centerpiece ideas
- Balloon centerpiece idea
- Easter Peeps Garden centerpiece
What do you think? Are you up to the challenge now that you know the secrets to flower arranging?
If you like this post, PIN, Share, or sign up for our Newsletter at the top of the page. And don’t forget to follow CAH on Instagram or Facebook. Cheers!


Please explain how a hydrangea can be “cut into two nice sized heads.” I think that would be very useful.
Joy, sometimes I find them so large (not always) that I basically cut them down the middle. You know how the flower part is attached to the long stem via several small stem offshoots? I just find the mid point in there and cut lengthwise all the way down the main stem.
Great tip, Chris! I always buy both flowers and greenery, but I’ll definitely start buying extra filler 🙂
It’s such a game changer, Liz!